Thursday, 28 November 2013

How To Disable the Automatic Restart on System Failure in Windows 7


Windows 7 is configured by default to restart immediately after a Blue Screen of Death (BSOD) or other major system problem. This reboot usually happens too fast to see the error message on screen.
Follow these simple steps to disable the automatic restart feature for system failures in Windows 7.
Important: Unable to boot completely into Windows 7 due to the BSOD? See Tip #2 at the bottom of this page for help.
Difficulty: Easy
Time Required: Disabling the Automatic Restart option in Windows 7 usually takes less than 10 minutes

Here's How:

  1. Click on the Start button and then on Control Panel.
    Tip: In a hurry? Type system in the search box after clicking Start. ChooseSystem under the Control Panel heading in the list of results and then skip to Step 4.
  2. Click on the System and Security link.
    Note: If you're viewing the Small icons or Large icons view of Control Panel, you won't see this link. Simply double-click on the System icon and proceed to Step 4.
  3. Click on the System link.
  4. In the task pane on the left, click the Advanced system settings link.
  5. Locate the Startup and Recovery section near the bottom of the window and click on the Settings button.
  6. In the Startup and Recovery window, locate and uncheck the check box next toAutomatically restart.
  7. Click OK in the Startup and Recovery window.
  8. Click OK in the System Properties window.
  9. You can now close the System window.
  10. From now on, when a problem causes a BSOD or another major error that halts the system, Windows 7 will not force a reboot. You'll have to reboot manually when an error appears.


    BSOD (Blue Screen of Death)

    Definition: Abbreviated as BSOD or BSoD, the Blue Screen of Death is the popularized name for what is technically called a STOP message or STOP error. It's the blue, full screen error that often displays after a serious system crash. The text on the Blue Screen of Death may list any files involved in the crash including any drivers that may have been at fault and often a short, usually cryptic, description of what to do about the problem.


    courtesy:http://pcsupport.about.com

Friday, 8 November 2013

http://akulapraveen.blogspot.in/


  • Android is a mobile operating system created by Google that has the capability of being edited by any open-source developer.
  • Think of it as the underlying software that instructs your device what to do, much like how the Windows operating system powers laptop and desktop computers.

  • However , Android is not just for mobile phones: it is an embedded operating system suitable for any device with a display. Typical applications include medical equipment, test equipment and multimedia consumer devices. 

  • Unlike closed systems that depend on one company for innovative new ideas, Android is “open to the public” – people can edit, add, and personalize Android, and Android takes on popular, useful ideas in future versions.
  • Android is created with various layers, including Linux Kernel, the Android native libraries, the Android runtime, the Application Framework layer, and the Applications layer.
  • Android code is written internally in C/C++, but developers can access them through Java interfaces.
  • Developers most often add or edit Android code in the Applications layer.


  • Android is an open source operating system — a large community of companies and developers maintain it and contribute toward developing newer versions of it. 
  • This all takes place under the auspices of Google, which bought the company (Android, Inc.) that first developed the Android OS.

  • Unlike Apple’s iOS operating system for mobile devices, the Android operating system’s ongoing development isn’t hidden behind lock and key.

  • In fact, about 80 companies are members of the group — the Open Handset Alliance — that contribute towards the further development of the Android operating system.
  • All of this openness allows for innovation from many different sources. 
  • This also allows for many different Android devices in all shapes and sizes, which creates a compatibility problem for the app developers. 
  • The compatibility issue with Android devices has even got a name: fragmentation.
  • Manufacturers can modify the Android operating system as they see fit for their devices. 
  • This allows them a way to differentiate their devices from their competitors’ devices, by adding unique features. 
  • This also results in different customized versions of Android running on different devices.


An example of this is that mobile phone maker HTC inserts its own HTC Sense user interface into many of its Android phones, whereas Samsung puts its own TouchWiz user interface into its Android devices. 

The following figure shows a couple of screens from the Samsung Epic 4G Android phone.

The Samsung Epic 4G Android phone’s home page (left) and one of the app pages (right).

*********************************************************************************

Architecture of Android

In order to understand how Android works, take a look at given below Figure, which shows the various layers that make up the Android operating system (OS).
The Android OS has four to five layers !

➤ Linux kernel            


  • ·       This is the kernel on which Android is based.
  • ·       This layer contains all the low-level device drivers for the various hardware components of an Android device.

➤ Libraries                  


  • ·       These contain all the code that provides the main features of an Android OS.
  • ·       For example, the SQLite library provides database support so that an application can use it for data storage.
  • ·       The WebKit library provides functionalities for web browsing.


➤ Android runtime          —

  • ·       At the same layer as the libraries, the Android runtime provides a set of corelibraries that enable developers to write Android apps using the Java programming language.
  • ·       The Android runtime also includes the Dalvik virtual machine, which enables every Android application to run in its own process, with its own instance of the Dalvik virtual machine (Android applications are compiled into the Dalvik executables).
  • ·       Dalvik is a specialized virtual machine designed specifically for Android and optimized for battery-powered mobile devices with limited memory and CPU.


➤Application framework  

  • ·       Exposes the various capabilities of the Android OS to application developers so that they can make use of them in their applications.

➤ Applications                    

  • ·       At this top layer, you will find applications that ship with the Android device (such as Phone, Contacts, Browser, etc.), as well as applications that you download and install from the Android Market.
  • ·       Any applications that you write are located at this layer.

Courtesy : http://akulapraveen.blogspot.in/

Sunday, 27 October 2013

Five safety tips for using a public computer


Public computers in libraries, Internet cafes, airports, and copy shops can be safe if you follow a few simple rules when you use them.
Read these tips to help keep your work, personal, or financial information private.
  • Don't save your logon information

    Always log out of websites by clicking "log out" on the site. It's not enough to simply close the browser window or type in another address.
    Many programs (especially social networking websites, web mail, and instant messenger programs) include automatic login features that will save your user name and password. Disable this option so no one can log in as you.
  • Don't leave the computer unattended with sensitive information on the screen

    If you have to leave the public computer, log out of all programs and close all windows that might display sensitive information.
  • Erase your tracks

    Internet Explorer offers InPrivate browsing that leaves no trace of specific web activity. For more information, see Internet Explorer 9 Features: InPrivate Browsing.
    Internet Explorer also keeps a record of your passwords and every page you visit, even after you've closed them and logged out.
    Disable the feature that stores passwords
    Before you go to the web, turn off the Internet Explorer feature that "remembers" your passwords.
    1. In Internet Explorer, click Tools  Gear icon, and then click Internet Options.
    2. Click the Content tab, and then click Settings, next to AutoComplete.
    3. Click to clear the check box for User names on passwords and forms.
    Delete your temporary Internet files and your history
    When you finish your use of a public computer, you can help protect your private information by deleting your temporary Internet files. For information on how to delete temporary Internet files see Delete webpage history.
  • Watch for over-the-shoulder snoops

    When you use a public computer, be on the look out for thieves who look over your shoulder or watch as you enter sensitive passwords to collect your information.
  • Don't enter sensitive information into a public computer

    These measures provide some protection against casual hackers who use a public computer after you have.
    But keep in mind that an industrious thief might have installed sophisticated software on the public computer that records every keystroke and then emails that information back to the thief.
    Then it doesn't matter if you haven't saved your information or if you've erased your tracks. They still have access to this information.
    If you really want to be safe, avoid typing your credit card number or any other financial or otherwise sensitive information into any public computer.
    source: Microsoft.com

Friday, 25 October 2013

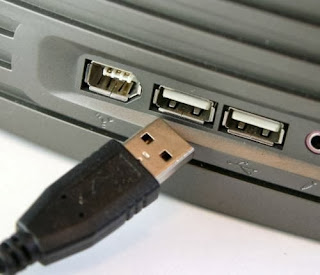
PC not recognizing your USB drive? Here's what to do

If your PC is not recoignizing your USB drive, then here are some tips to save your day.
External drives — either USB flash drives or external hard drives — should be easy to use. In some cases, you may connect your drive to a Windows PC or another device with a USB port and find that it's not recognized. This problem can be caused by partition issues on your external drive, using the wrong file system, dead USB ports, driver issues in Windows, or other problems. In a worst case scenario, the drive itself may simply be dead. 

The steps below will be the same for both USB flash drives and larger external hard drives, which work similarly. 

Does the drive show up in disk management?
First, let's check whether Windows detects the drive when you plug it in. Plug your removable drive into your computer. If it's an external hard drive, you may have to flip a power switch on the hard drive to activate it. Some heavy-duty removable hard drives may even have to be plugged in with a separate power cable before they'll work. 

Next, open the Disk Management tool. To do so, press Windows Key + R, type diskmgmt.msc into the Run dialog, and press Enter. 

You should see your external drive listed in the Disk Management window. Even if it doesn't appear in your Computer window because it doesn't contain any partitions, it should show up here. 

If you do see the drive here, you can continue to the last section where we'll format it properly so Windows or your other devices can access and recognize it.If you don't see the drive here, continue to the next section where we'll try to determine why your drive isn't recognized. 

Making Windows recognize the drive 

If Windows doesn't see your drive at all, it's possible there's a hardware issue with your computer's USB port, a driver problem with your Windows computer, or you may just have a dead drive. 

First, unplug the drive from your USB port and try plugging it into another USB port on your computer. If it works in one USB port but not another, you may have a dead USB port. If you've plugged the drive into a USB hub, try connecting it to the computer instead. Some USB hubs won't provide enough power for your external drive to function. 

If the drive doesn't show up in Disk Management even after you skip the USB hub and connect it to another USB port on your computer, it's tough to know for certain whether the drive itself is bad or the computer is having a problem. If you have another computer nearby, try plugging the drive in there to check whether it's detected. If the drive doesn't work on any computer you plug it into — be sure to check whether it appears in the computer's Disk Management window — the drive itself is likely dead and will need to be replaced. 

If the drive does work on other computers — or you don't have another computer around to test this with — Windows may be having a driver problem with the drive. You can check for this using the Device Manager. 

To open it, press Windows Key + R, type "devmgmt.msc" into the Run dialog, and press Enter. 

Look under Disk drives and check for any devices with a yellow exclamation mark next to them. If you see a yellow exclamation mark, you have a driver problem. Right-click the device with a yellow exclamation mark, select Properties, and look at the error message. This error message can help you fix the problem — you may want to perform a Google search for the error message you find. 

Such problems can be tricky to fix. If the problem started recently, you may want to run System Restore. You may want to use the Update Driver button to install an updated driver, use the Roll Back Driver button to revert any changes, or use the Uninstall button to uninstall the device from your system and hope that Windows will reinstall the driver and configure it correctly when you reconnect the drive. 

Partitioning and formatting the drive 

We can use the Windows Disk Management tool to fix partition and file system issues with the drive. If you see that the drive is unpartitioned and is full of "unallocated space," you'll want to create a new partition on it. This will allow Windows and other operating systems to use it. 

To do so, right-click inside the unallocated space, select New Simple Volume, and go through the wizard to create a new partition. 

If your drive is partitioned and you still can't see it, ensure you've set a drive letter so you can access it in Windows. This should happen automatically, but if you've manually unset the drive letter, the drive may not show up and be accessible in Windows. 

To do this, right-click the removable drive's partition, select Change Drive Letter and Paths, and add a drive letter. For example, add the letter G: and the removable drive will be accessible at drive G. 

If the drive does appear to be partitioned, it may be partitioned with the wrong file system. For example, you may have formatted the drive with the ext4 file system from Linux or the HFS Plus file system from a Mac. Windows can't read these file systems. Reformat the drive with the newer NTFS file system or older FAT32 file system so Windows will be able to recognize it. 

To reformat a partition, right-click it, select Format, and select your desired file system. 

Note that this will erase all the files on your drive, so you'll want to copy any important files off of it first — for example, if you formatted the drive on a Linux or Mac computer, take it back to a computer running Linux or Mac and copy your important files off of it before continuing. 

If you can't access the drive from another device, such as a DVD player, smart TV, game console, or media center device, it may be formatted as NTFS. Many devices, even Microsoft's own Xbox 360, can't read the Windows NTFS file system. They can only access drives formatted with the older FAT32 file system. To fix this problem, simply reformat the NTFS partition as FAT32. The drive should then be recognized by other devices when you connect it to them. 

Note that this process will erase the files on your external drive. Copy the files off the drive to back them up first, if necessary.format-removable-drive-as-fat32Following this process should solve most of the disk recognition issues you'll encounter. If a drive isn't recognized by any computer you connect it to and never shows up in the Disk Management window, it's probably dead.

Tuesday, 22 October 2013

INCREASE DRIVE SIZE IN WINDOWS 2003 SERVER

Partition Hard Disk Drive For Windows Server 2003 By Free Partition Manager

It is well known that when the programs and files get more and more on the computer, the space of some particular partitions will get smaller and smaller, and consequently, the Windows Server 2003 will have some trouble doing its normal operation, such as updates and installations. And for most system administrators, it will be a hard job to improve this situation and manage partitions well.

Process Of Resizing/ Moving Partition By Free Partition Manager Server 2003

Maybe you are an IT professional, maybe not. But it doesn't matter; you still can resize or move partitions in Windows Server 2003 with the help of this freeware. AOMEI Partition Assistant Lite Edition is very easy to operate. What you have to do is launching it, and then following the wizards step by step.

Note: We can Operate this tool ie. Resize/Move Partition without loss our data.
But Database Backup  is must


Source : http://www.disk-partition.com/download-server.html

Friday, 11 October 2013

TUTORIAL FOR TAKING SCREEN SHOT IN WINDOWS

Press the "Print Screen" button on your keyboard. This will capture an image of your entire screen and copy it to the clipboard. The dimensions of the image will be the same as your desktop resolution.


Paste the screenshot. Once you’ve made the screenshot, you will need to paste it to a program in order to see it. The most common way to paste it is into a Paint file. This will allow you to save it as an image file that can be transferred to others.

Open Paint from the Accessories section in your Start menu. With a new blank canvas open, press Ctrl + V to paste the image onto the canvas. You can also open the Edit menu and select Paste, or right-click on the canvas and select Paste.

Click File, then Save to set the name and file type of the image. The most common file types are JPG and PNG. The recommended format for screenshots is PNG, due to the high quality and small file size.


Note: Hold down the "Alt" key and press "Print Screen" to take single active window Screenshot.


Courtesy : http://potools.blogspot.in

Monday, 30 September 2013

VLC Media Player 2.1.0 Rincewind: New features & revie

VLC Media Player, the best media player for Windows, has become even better with its 2.1 release named “Rincewind”. Bugs have been fixed, quality has been improved, and for sure new features have been added. Bugs have been fixed in large amounts and now VLC supports many new inputs and devices. VLC 2.1.0 is the first release to be officially get ported to iOS and Android, and partially to Windows Store App and Windows RT.
VLC 600x402 VLC Media Player 2.1.0 Rincewind: New features & review
VLC Media Player

Rincewind has a rewritten audio core which allows better volume outputs and better device management. In order to support the new core, some of the modules have also been rewritten. Rincewind also correctly support multi-channel layouts in all formats: 5.1, 6.1 and 7.1. All new audio outputs have been added to give its user a good and smooth audio experience.
If we see video improvements, most of them are done for Mobile Versions, as color conversion shaders are now supported on Android and iOS, and a new filter for side-by-side 3D has been successfully introduced. Moreover Open GL output has been ported to OpenGL ES and as a result of which VLC has introduced new video outputs for iOS using OpenGL ES2.
Hardware encoding for various platforms has been added and VLC now supports Microsoft Smooth Streaming. Now VLC shows support for fragmented MP4, Wave/RF64 files and for FLAC, Atrac, ADPCM, DV Type 1, 12bits DV audio in AVI files.
Some of the extended features are
  • Better support for AVI and MKV files
  • Audio fingerprinting using AcoustID
  • Developments on Blu-Ray, Dash and HTTP inputs
  • Better windowless integration for HTML
  • Many more features…
There are many other features included, out of which some are very useful for developers and rest for all the VLC lovers. This release has added something essential to the software and it has been made better. Rincewind update is considered to be as one of the important VLC updates since it includes a lot major and minor improvements.
We’ve seen many bugs fixed and many new features added. The best ever media player has become even better. You will find the updates very useful, as all the codec upgrades can play maximum file formats smoothly.
Click here to download VLC Media Player.